Environmentally Conscious and Economically Sound Machine Dismantling Forum > Kenosha
> Agriculture and Food
> Ploughs
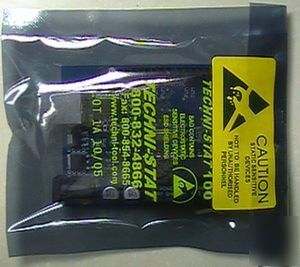
> New arduino duemilanove 2009 ATMEGA168-20PU+usb cable
New arduino duemilanove 2009 ATMEGA168-20PU+usb cable
Arduino3.jpg picture by townzbz2Arduino2.jpg picture by
The Arduino Duemilanove ("2009") is a microcontroller board based on the ATmega168 (datasheet) or ATmega328 (datasheet). It has 14 digital input/output pins (of which 6 can be used as PWM outputs), 6 analog inputs, a 16 MHz crystal oscillator, a USB connection, a power jack, an ICSP header, and a reset button. It contains everything needed to support the microcontroller; simply connect it to a computer with a USB cable or power it with a AC-to-DC adapter or battery to get started.
"Duemilanove" means 2009 in Italian and is named after the year of its release. The Duemilanove is the latest in a series of USB Arduino boards; for a comparison with previous versions, see the index of Arduino boards.
14 (of which 6 provide PWM output)
16 KB (ATmega168) or 32 KB (ATmega328) of which 2 KB used by bootloader
1 KB (ATmega168) or 2 KB (ATmega328)
512 bytes (ATmega168) or 1 KB (ATmega328)
EAGLE files: arduino-duemilanove-reference-design.zip
Schematic: arduino-duemilanove-schematic.pdf
The Arduino Duemilanove can be powered via the USB connection or with an external power supply. The power source is selected automatically.
External (non-USB) power can come either from an AC-to-DC adapter (wall-wart) or battery. The adapter can be connected by plugging a 2.1mm center-positive plug into the board's power jack. Leads from a battery can be inserted in the Gnd and Vin pin headers of the POWER connector.
The board can operate on an external supply of 6 to 20 volts. If supplied with less than 7V, however, the 5V pin may supply less than five volts and the board may be unstable. If using more than 12V, the voltage regulator may overheat and damage the board. The recommended range is 7 to 12 volts.
The power pins are as follows:
* VIN. The input voltage to the Arduino board when it's using an external power source (as opposed to 5 volts from the USB connection or other regulated power source). You can supply voltage through this pin, or, if supplying voltage via the power jack, access it through this pin.
* 5V. The regulated power supply used to power the microcontroller and other components on the board. This can come either from VIN via an on-board regulator, or be supplied by USB or another regulated 5V supply.
* 3V3. A 3.3 volt supply generated by the on-board FTDI chip. Maximum current draw is 50 mA.
The ATmega168 has 16 KB of flash memory for storing code (of which 2 KB is used for the bootloader); the ATmega328 has 32 KB, (also with 2 KB used for the bootloader). The ATmega168 has 1 KB of SRAM and 512 bytes of EEPROM (which can be read and written with the EEPROM library); the ATmega328 has 2 KB of SRAM and 1 KB of EEPROM
Next, a brief look at the use of Arduino Duemilanove 2009
We want the Arduino on your windows computer up and running. In the arduino on the official website of http://arduino.cc/en/Guide/Windows described in detail, if it is not used to see that the English friends can look at the colt folder Note:
(1) hardware ready Arduino board and USB cable.
(2) the software will need to download proprietary software Arduino Environment, the current version is 0017 latest, download address is: http://arduino.googlecode.com/files/arduino-0017.zip download unzip.
(3) ready USB drive, FT232RL due to the use FTDI's USB-UART device, need to download its driver FTDI officer, for we often use windows xp and vista systems, the latest driver version: 2.06.00, Download address: http:// /Drivers/CDM/CDM% 202.06.00% 20WHQL% 20Certified.zip download unzip.
(4) The following can be the Arduino board using USB cable connected to your computer up, and 2009 version of the design integrated into the power supply self-test functions, therefore, will not receive external power supply case, the 09 version of Arduino can automatically take power from the USB port, to be numbered PWR red led indicator light. The computer will pop up a found new hardware window. The third option and click Next.
Select the second item "from the specified path to install", click Next.
Click Browse, select the first (3) step in the decompression FTDI USB driver files, click Next.
The system will automatically install the driver, wait until the installation is complete
(5) Open (2) step to download and decompress a good Arduino-0017 folder, and run the Arduino Environment Software
(6) Now you can download an example program to Arduino 2009 board work together, and first seen in PC's Device Manager, look, you can find the serial port (Ports) Department, an increase of a COM4 (on different computers will be different from the values , but usually COM3, COM4, COM5 the most common).
In the open Arduino Environment software, in the Tools / Serial Port is selected under the Device Manager just now found COM4,
(7) Now open an editor's own examples of procedures for LED blinking, as shown in the File / Examples / Digital Next
8) Tools / Board select Arduino Diecimila ... w / ATmega168
